
Projects
Projects on Sundog do two jobs.
- they organise groups of experiments into a larger data structure, making it easy to collect related work.
- they allow you to control more fine-grained access to experiments within them - both to members inside the lab, and guests from outside it.
A Sundog project maps well to a real-world project.
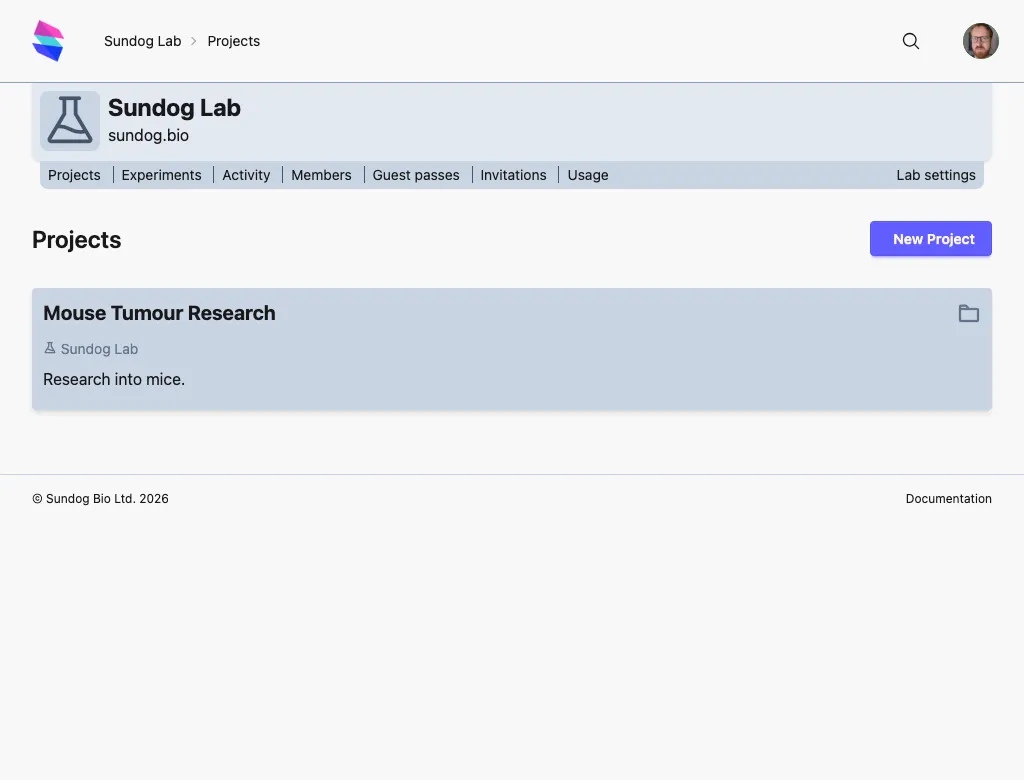
The lab’s project page lists all the projects in a lab, and the button top right lets you make a new one.
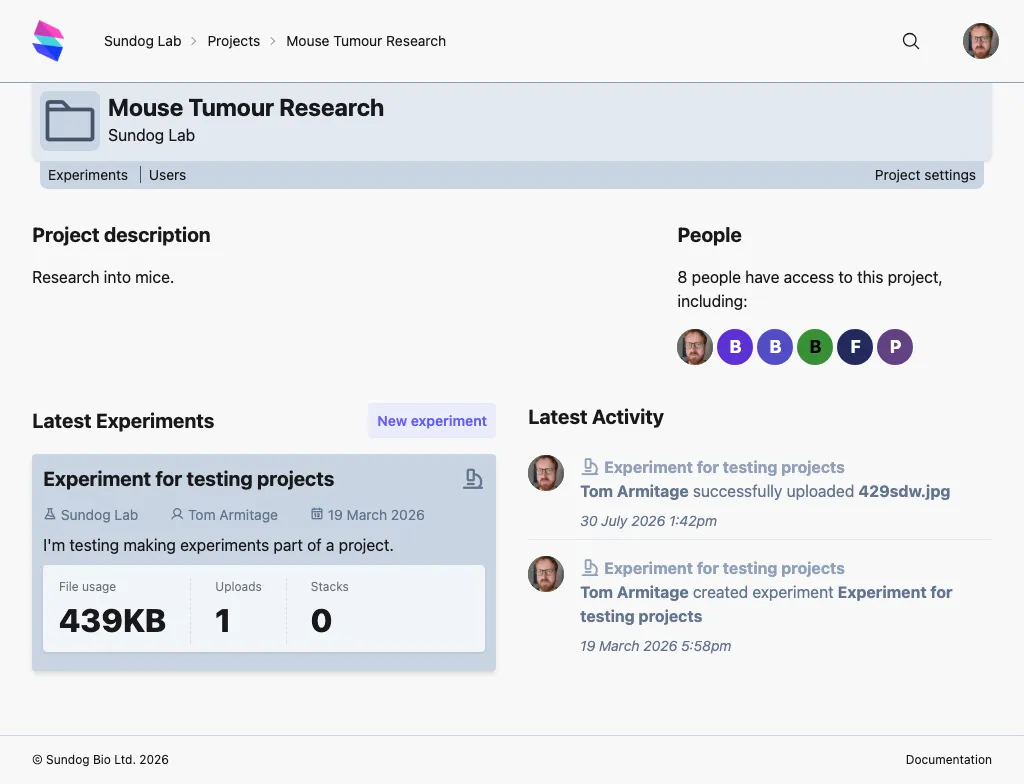
An individual project page shows a description of the project, latest experiments and activity within the project, plus the users who have access to the project. It’s very similar to the lab page.
The projects sub-menu throughout links to pages listing experiments and users in the project. Any project owners can also manage the experiments in the project, and users with access to it, from this page.
Creating a project
Section titled “Creating a project”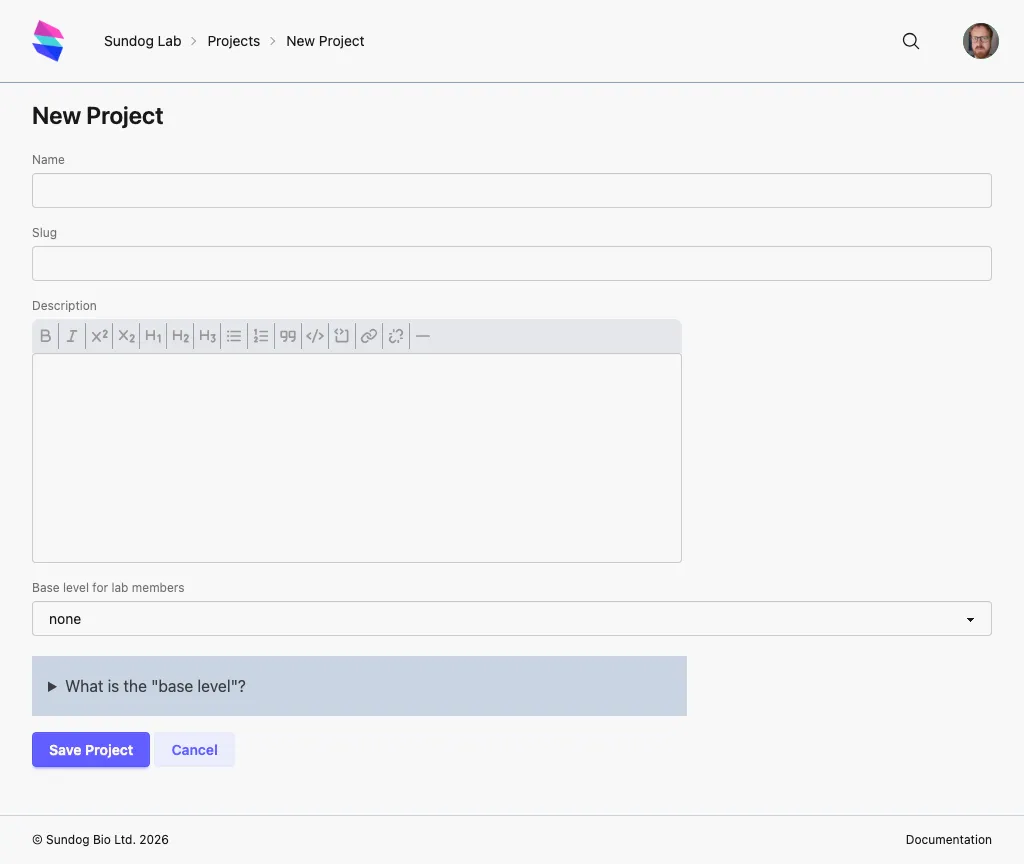
Any lab member can create a project within a lab they belong to. Projects are as useful for managing your own private work as for collaborating with others.
From the project creation form, you can name the project and write a description. The slug - used in the URL - will be auto-generated from the name, but you have an opportunity to edit it at creation if you’d like.
Finally, you can choose the base level for the project. This sets the default access level for anybody else in the lab.
Project access levels
Section titled “Project access levels”Access to a project is controlled via levels. Your level on a project determines what you can do and see within it. There are five levels of access:
| Label | Description |
|---|---|
| Owner | Owns the project. Can add/remove people to/from the project and change their access levels. Can add/remove experiments from the project. Full access to experiments in the project. Can alter the project itself, including deleting it. The project creator is its owner by default, but other users can be given this permission. |
| Experimenter | Full access to experiments to the project, including creating/adding them, making stacks and uploads, etc - but no rights to alter the project or its users. |
| Commenter | No rights to add/create experiments in the project, but can see experiments in the project and comment/annotate stacks. |
| Viewer | Can see experiments and stacks in the project, but cannot comment/annotate |
| None | Cannot see the project at all. |
Other users can be granted explicit permission to access the project, with a specific level.
A project must have at least one owner.
Projects → Experiments
Section titled “Projects → Experiments”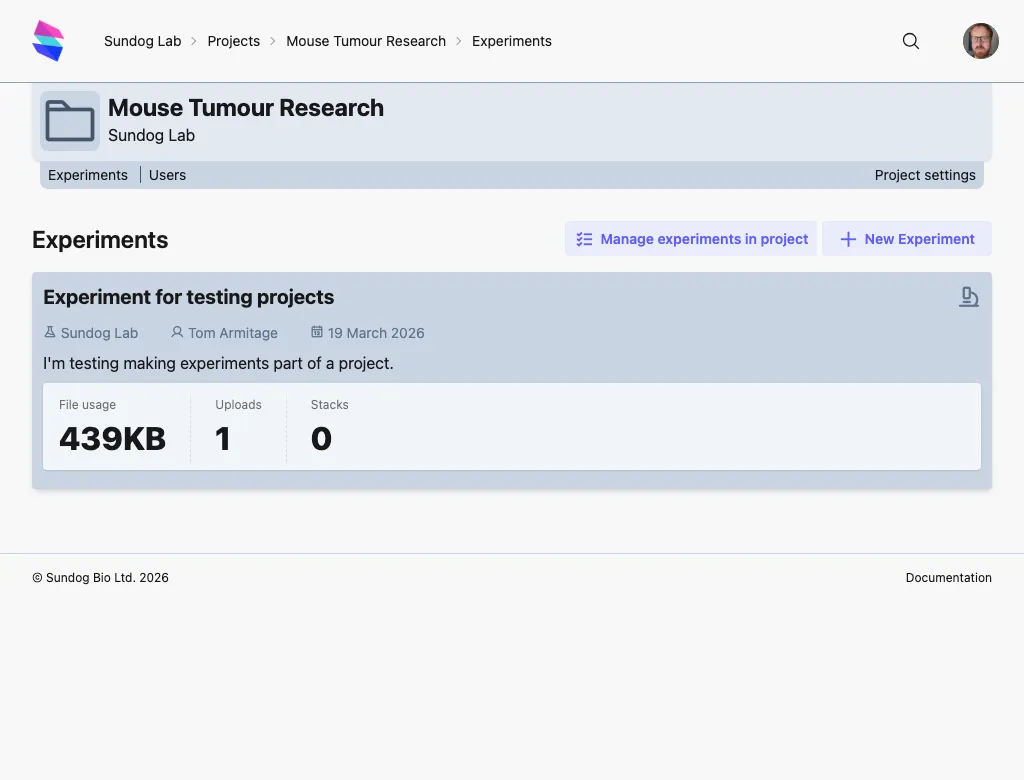
The experiments page in a project lists and paginates all the experiments in a project. The buttons top right give you a shortcut to creating a new experiment in this project, and to the experiment manager for the project.
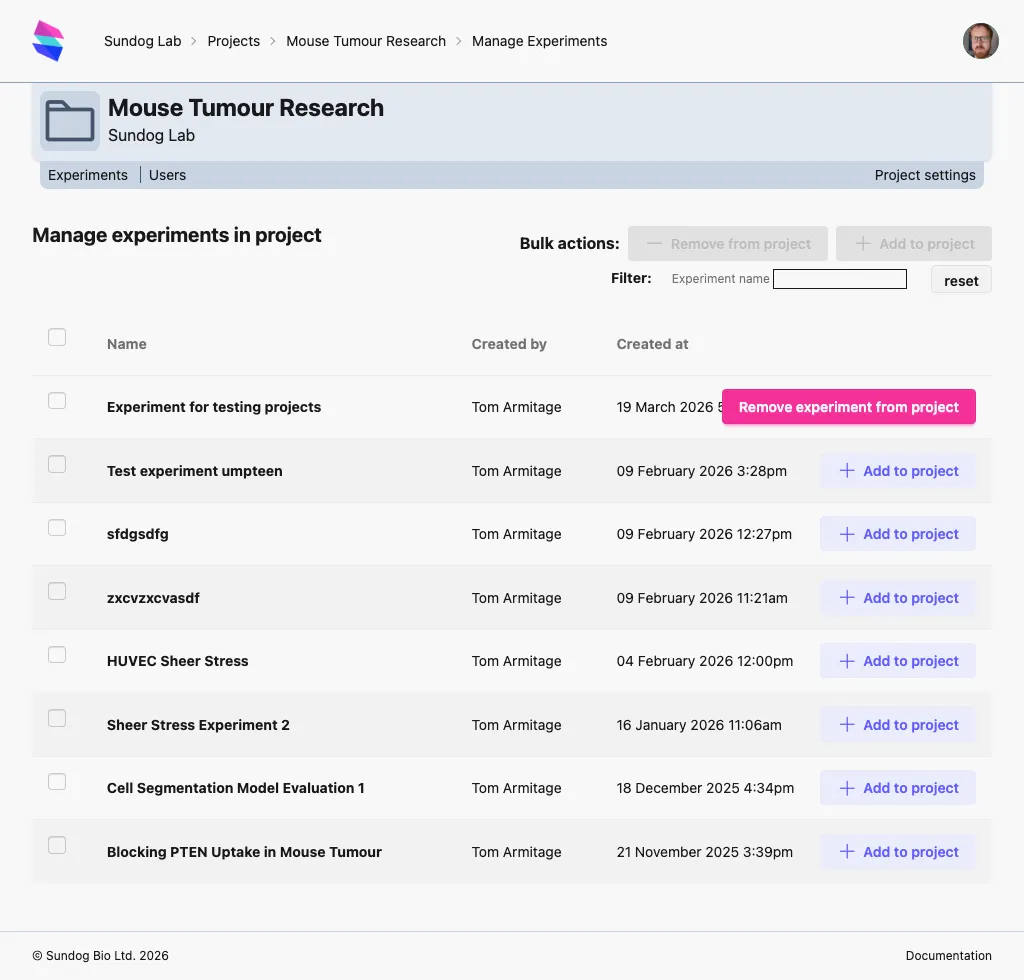
The experiment manager lists all experiments in the lab, and lets you add / remove experiments to the project. The bulk add/remove functionality is enabled by selecting rows with checkboxes. The filter textbox will search the lab for specific experiments.
When you remove a project from an experiment, you’ll be asked to confirm your action before it is remove. If doing so will make the experiment visible to more people than it previously was, you will be warned of this.
Projects → Users
Section titled “Projects → Users”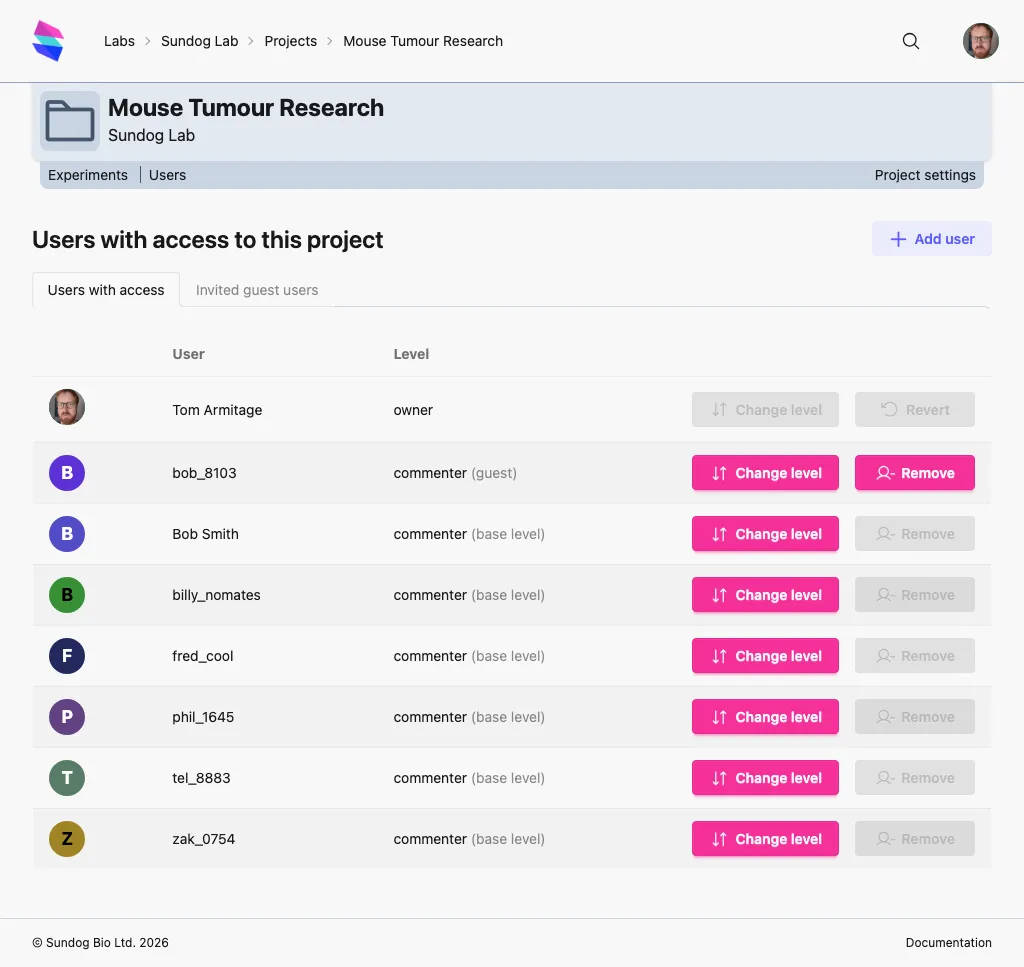
The users page for a project lists everyone with access to a project: first, anyone with an explicit permission on the project, and then anyone else in the lab who has access via the base level if there is one.
Click change level to alter the level of an explicit permission, or to create an explicit permission for someone with a base level.
Click revert to remove an explicit permission from a user when there is a base level present for the project.
Click remove to remove an explicit permission from a user who is not eligible for a base level (the base level is None, or the user is a guest).
You cannot remove your own permission.
Adding users to a project
Section titled “Adding users to a project”Click “add user” from the Users page to add someone in the lab to the project.
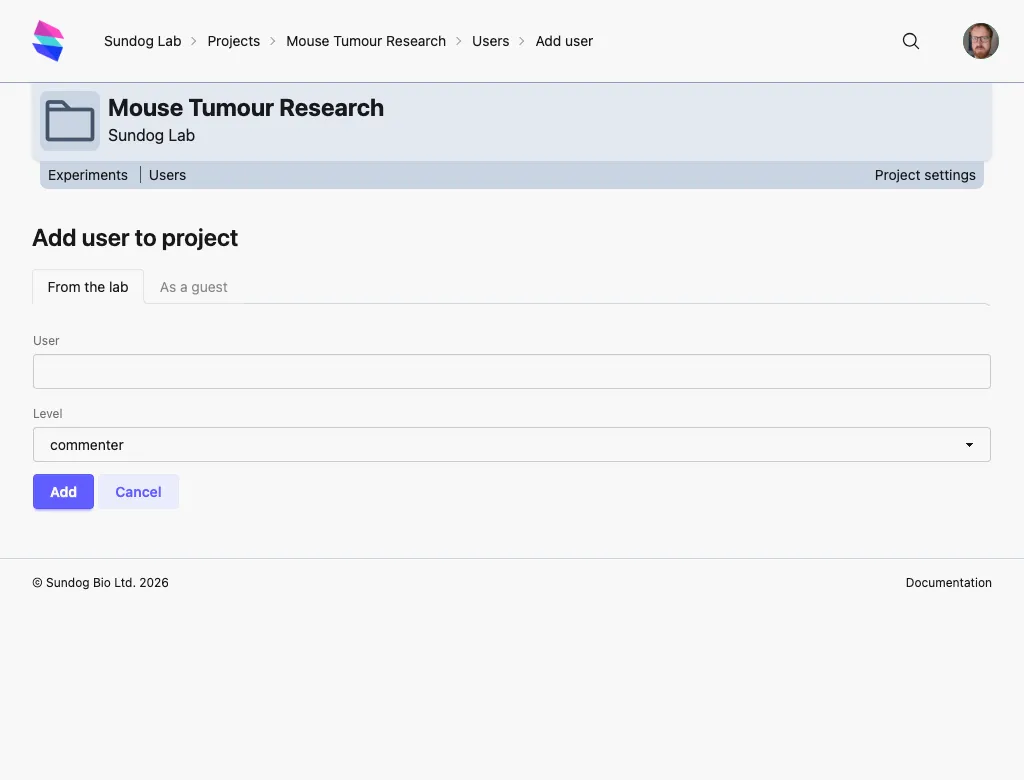
There are two tabs on this page. Which to select depends on who you wish to invite.
“From the lab”
Section titled ““From the lab””This tab adds lab members to a project. They will be immediately given access upon clicking “add”.
The “user” field autocompletes by username or display name - search for the user you’d like and select them by clicking on them. Then, specify the access level you’d like them to have.
“As a guest”
Section titled ““As a guest””This tab allows you to invite people outside the lab as a guest to the project. Instead of autocompleting their username, you will put in the email address you wish the invitation to be sent to.
As a guest, they can only have a level of viewer or commenter.
Finally, there is an option to add a message. If the person you are inviting has never used Sundog before, this is a good opportunity to quickly explain what they are being invited to. Clicking Invite will then invite them to the project.
Pending guest invitations can be seen on the Invited guest users tab of the Project → Users page. (Once their invitation is accepted, they will appear on the Users with access tab).